We’re thrilled to have you here. Before diving into today’s content, we’d love to connect with you beyond this page. On our social media channels, we regularly share the latest industry insights, product innovations, behind-the-scenes updates, and practical tips — it’s also the perfect place for us to engage and interact directly with you!
Follow us on:
- Facebook: Linyang Huayang Machinery Co., Ltd.
Let’s grow, learn, and innovate together.
Table of Contents
Introduction
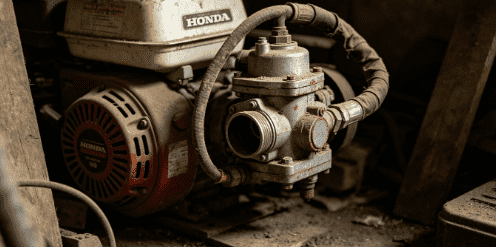
Understanding how to adjust float carburetor systems is essential for anyone maintaining small engines, motorcycles, lawn mowers, generators, chainsaws, or other carbureted equipment. A carburetor relies on a precise fuel-to-air mixture, and that mixture depends heavily on the float mechanism that regulates the fuel level in the float bowl. When the fuel level is too high, engines may run rich, leading to black smoke, fouled spark plugs, sluggish acceleration, and fuel waste. When the level is too low, engines run lean, resulting in hesitation, backfiring, overheating, and loss of power.
The process to adjust float carburetor settings may seem intimidating, but with the right knowledge, accurate measurements, and a step-by-step approach, anyone can perform this task safely and confidently. This guide covers the essential steps, diagnostic symptoms, technical details, and professional insights necessary to help you fully understand how to adjust float carburetor systems with precision. You will also learn how float height varies across carburetor models, how the float mechanism works, and how environmental conditions can influence fuel behavior inside the bowl.
This article presents five detailed steps for mastering the adjustment process, but it also goes beyond the basics. You will find in-depth explanations, small-engine engineering principles, cross-model comparisons, troubleshooting advice, measurement recommendations, safety precautions, maintenance tips, and a mid-article table comparing typical float height ranges across different carburetor brands.
The goal is to equip you with all the technical understanding required to confidently adjust float carburetor components in your workshop or garage.
Understanding How a Float Mechanism Works in a Carburetor
Before you begin learning how to adjust float carburetor settings, it is essential to understand how the float system functions inside the carburetor.
The Purpose of the Float Bowl
The float bowl acts as a reservoir that maintains a consistent level of fuel for the carburetor jets. As the fuel level drops while the engine runs, the float lowers and opens the needle valve, allowing more fuel into the bowl. When the level reaches the correct height, the float rises and closes the valve, stopping fuel flow.
How Fuel Level Affects Engine Performance
The fuel level in the bowl directly impacts the mixture delivered to the engine:
Higher fuel level
Leads to richer mixture because jets sit deeper in fuel
Lower fuel level
Creates a leaner mixture because jets have less fuel pressure
Precise float height ensures optimal air-fuel balance and proper engine operation.
Common Floating Materials
Carburetor floats are typically made from:
- Brass
- Plastic
- Nitrophyl foam
Each material has slightly different buoyancy and reacts differently to modern ethanol-blended fuels.
Step-by-Step Process: 5 Ways to Adjust Float Carburetor

Below are the five major steps required for proper float adjustment, explained in a detailed, technical manner for both beginners and experienced technicians.
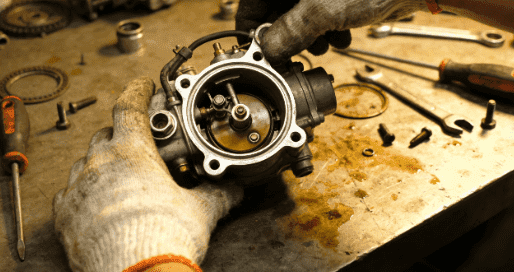
Disassemble the Carburetor and Access the Float Assembly
Safety Preparations Before Adjustment
Before performing any steps to adjust float carburetor units, ensure you follow safety precautions:
Turn off the engine and disconnect the spark plug
This prevents accidental ignition.
Work in a ventilated area
Fuel vapors must not accumulate.
Drain residual fuel carefully
Prevent spills inside the workspace.
Wear gloves and safety glasses
Carburetor cleaner can irritate skin and eyes.
Removing the Carburetor from the Engine
Depending on the engine type, removal generally involves:
Disconnecting the fuel line
Removing throttle linkage
Disconnecting choke linkage
Unscrewing mounting bolts
Once removed, place the carburetor on a clean work surface.
Opening the Float Bowl
Carefully remove the screws securing the float bowl. Some carburetors may have gaskets that need replacement if damaged. Once removed, the float assembly, needle valve, and bowl interior become accessible.
Inspect the Float Condition Before Making Adjustments
Before you adjust float carburetor height, you must perform a full inspection of the float system.
Checking the Float for Damage
Look for:
Warped or cracked plastic floats
Dents in brass floats
Contaminated or fuel-logged nitrophyl floats
A float that absorbs fuel will lose buoyancy and must be replaced.
Inspecting the Float Hinge and Needle Valve
Ensure the hinge moves smoothly and that the needle valve tip is not worn.
Signs of a faulty needle valve include:
Grooves in the rubber tip
Fuel leakage when bowl is filled
Sticking movement during operation
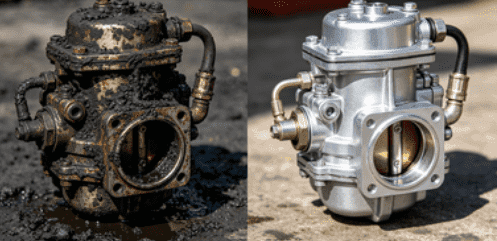
Examining the Float Bowl Interior
Residue, varnish, or sediment in the bowl can interfere with float movement. Clean thoroughly before reassembly.
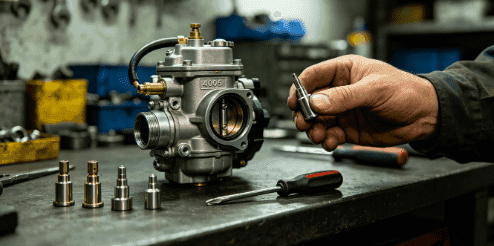
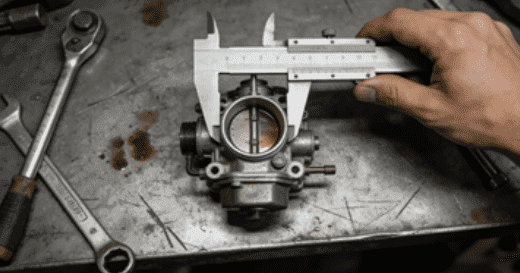
Measure the Current Float Height Precisely

This is the most critical step in learning how to adjust float carburetor specifications accurately.
Required Tools
Use highly accurate measuring tools such as:
Feeler gauges
Ruler with millimeter markings
Digital calipers
Float height gauge (specialized tool)
Positioning the Carburetor for Accurate Measurement
To measure float height:
Hold the carburetor upside down
Allow the float to rest lightly on the needle
Ensure the needle valve spring does not compress
Incorrect positioning will yield false measurements.
Manufacturer Specifications
Each carburetor model has a specific float height designed for optimal performance. If unavailable, industry averages can help (see table in the middle of this article).
Interpreting the Measurement
A float height lower than specification means the fuel level will be too high, resulting in a rich mixture.
A higher float height indicates a lean mixture.
Table: Common Float Height Ranges for Carburetor Models
Below is a comparison of typical float height measurements found in popular carburetor types. These measurements represent general ranges used across motorcycle, lawn mower, generator, and power equipment engines.
| Carburetor Model | Typical Float Height (mm) | Float Material | Performance Notes |
|---|---|---|---|
| Mikuni VM Series | 22–24 mm | Plastic | Stable fuel control for motorcycles |
| Keihin PWK Series | 16–18 mm | Brass | High performance, responsive throttle |
| Walbro WT Series | 11–13 mm | Polymer | Compact design for chainsaws |
| Zama C1U Series | 8–12 mm | Nitrophyl | Excellent for handheld tools |
| Tillotson HL Series | 16–22 mm | Brass | Used in kart engines |
| Tecumseh Series 7 | 26–30 mm | Plastic | Common in lawn mowers |
| Briggs & Stratton Float Carb | 25–27 mm | Plastic | Very stable under vibration |
| Honda GX Series | 14–17 mm | Brass | Reliable for industrial engines |
This table helps illustrate how float height varies across brands and influences how to adjust float carburetor settings effectively.
Adjust the Float Height Using Precision Techniques
Once you know the correct float height, make careful adjustments.
Bending the Float Tab Properly
The float tab controls the needle valve opening. Move the tab slightly:
Bend tab upward
Raises float height → leans mixture
Bend tab downward
Lowers float height → enriches mixture
Never bend the float arms themselves; only adjust the tab.
Checking the Needle Valve Movement
Ensure the needle:
Moves freely
Seals properly
Does not stick
Replace if worn or aged.
Verifying Fuel Level After Adjustment
You can test the adjustment using either:
The clear-tube method
Attaching a transparent tube to the bowl drain to visualize fuel height
The “wet test”
Filling the bowl and checking actual level before mounting
Repeat Measurement Until Perfect
Float height accuracy should be within 0.5 mm of specification for optimal performance.
Reassemble the Carburetor and Perform Functional Testing
Reassemble Floats and Bowl
Once the adjustment is correct:
Install the float carefully
Reattach the float bowl
Ensure gaskets align properly
Tighten screws evenly
Mount the Carburetor Back onto the Engine
Reattach:
Throttle linkage
Choke cable
Fuel line
Mounting bolts
Start the Engine and Observe Performance
Look for:
Stable idle speed
No fuel overflow
No hesitation or stalling
Smooth throttle response
Fine-Tuning Mixture Screws (If Necessary)
Some carburetors require slight adjustment of idle mixture screws after float height changes.
Additional Technical Considerations for Accurate Adjustment
Altitude Effects on Float Behavior
High-altitude environments have thinner air, resulting in richer mixtures. A slightly higher float height may be required in mountainous areas.
Ethanol-blended Fuel Impact
Ethanol is more corrosive and evaporates differently than pure gasoline:
Raises risk of float swelling
Affects needle valve rubber tips
Can change fuel density
Regular inspection is recommended.
Temperature Influence
Cold weather thickens fuel, making float valves slower; hot climates cause faster evaporation. Float systems compensate for both to maintain fuel stability.
Advanced Troubleshooting After Adjustment
Fuel Overflow Issues
Possible causes:
Needle valve not sealing
Float sticking
Too low float height
Lean Running After Adjustment
Possible causes:
Float height too high
Air leak at gasket
Blocked pilot jet
Rough Idle
Check:
Idle mixture screw settings
Float hinge friction
Vacuum leaks
Conclusion
Learning how to adjust float carburetor mechanisms is an essential skill for anyone who relies on small engines, motorcycles, or power equipment. A properly adjusted float ensures balanced fuel delivery, stable idling, responsive throttle behavior, improved fuel efficiency, and extended engine lifespan. By following the detailed steps in this guide—disassembling, inspecting parts, measuring with precision, adjusting the float correctly, and performing thorough testing—you can confidently maintain your carburetor and restore optimal performance.
Float adjustments may seem minor, but even a 1 mm deviation can significantly influence mixture balance. That is why accurate measurement, attention to detail, and understanding of float behavior are crucial parts of performing a correct adjustment.
Regular maintenance and periodic inspections will help prevent future carburetor problems and ensure long-term reliability of your equipment.
FAQ
Q1: What are the most common signs that I need to adjust float carburetor components?
Common symptoms include fuel leaking from the overflow tube, black smoke from the exhaust, engine hesitation, poor idling, and difficulty starting. These issues typically indicate incorrect fuel level or float malfunction.
Q2: How often should float height be checked?
For engines used frequently, check every 100–150 operating hours. For seasonal equipment like lawn mowers or generators, check annually before use.
Q3: Can improper float height damage an engine?
Yes. A rich mixture can foul spark plugs and flood the engine. A lean mixture can cause backfiring, overheating, and even engine seizure in severe cases.
Q4: Do all carburetors require the same float height?
No. Each manufacturer and model has a specific float height. Always refer to model-specific measurements or use industry averages when necessary.
Q5: Can I adjust float carburetor settings without removing the carburetor?
Some models allow external fuel-level checks using the clear-tube method, but accurate float height adjustments require disassembling the carburetor.